By clicking “Accept All Cookies”, you agree to the storing of cookies on your device to enhance site navigation, analyze site usage, and assist in our marketing efforts. View our Privacy Policy for more information.
How to Publish and Share the Schedule with Your Employees
Once you’ve finished building your schedule and are satisfied with the results, it’s time to share it with your employees. To make the schedule visible to your staff, you’ll need to publish it - this means changing its status to “Published".
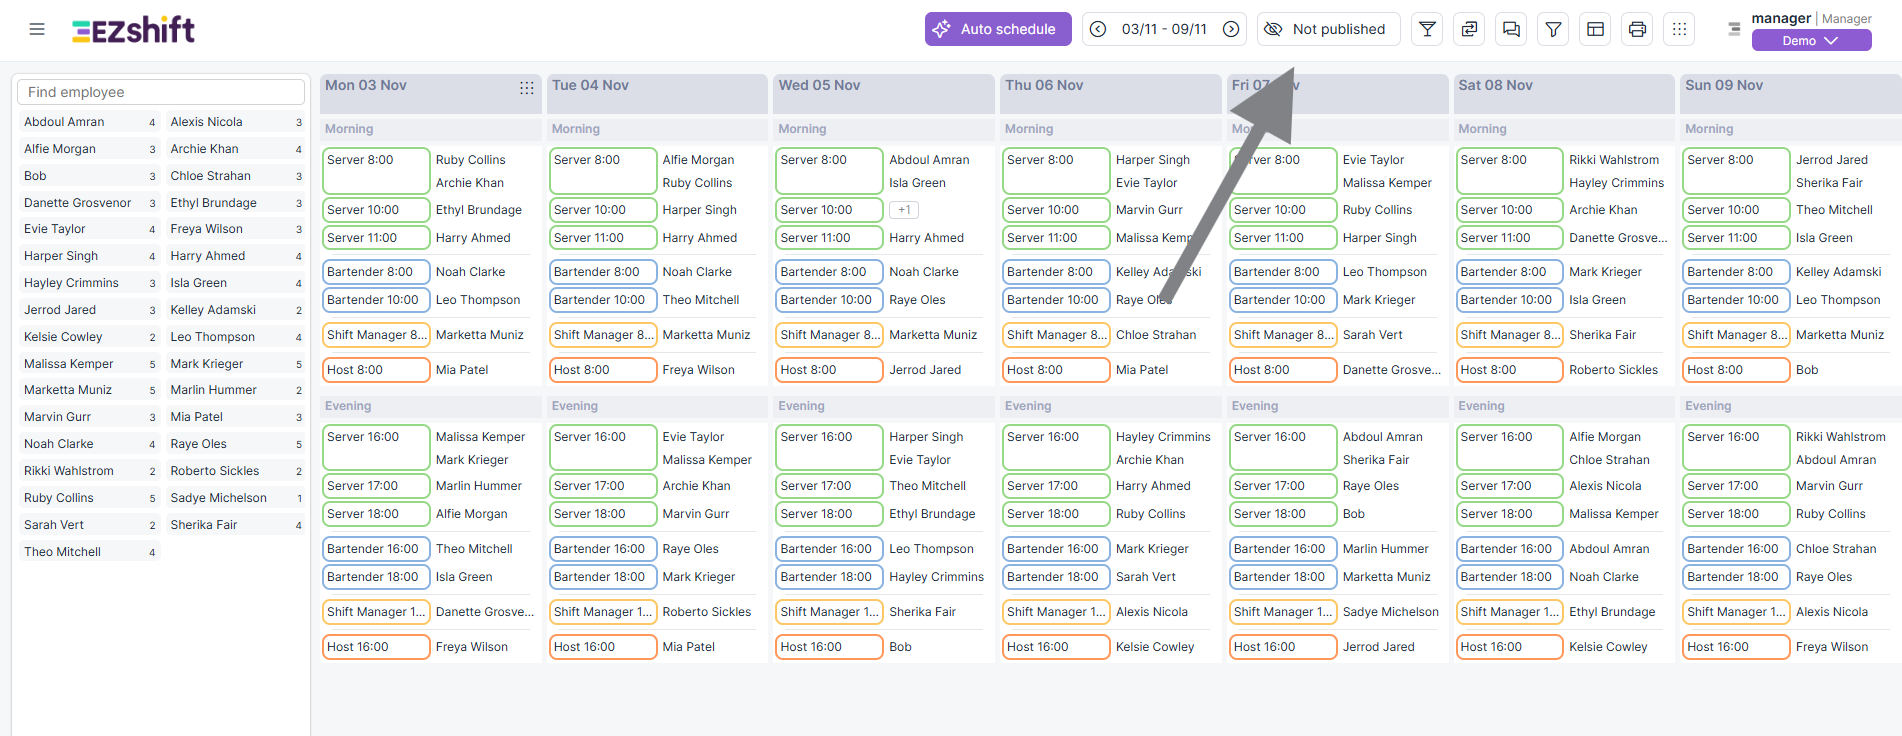
Step 1 - Open the Schedule
Make sure you are on the correct schedule that you want to share. Review all shifts and assignments before publishing. When you’re ready, click the Not Published button.
Step 2 – Click “Publish the Schedule”
This will open the publishing window, where you can choose the visibility mode and customize the message sent to employees.
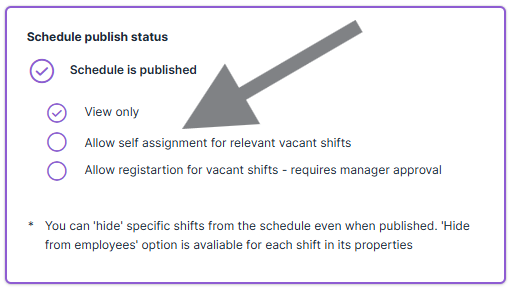
Step 3 - Choose the Publishing Mode
There are three publishing options:
View Only Employees can see the shifts they've been assigned to and the complete schedule. Use this when the schedule is final and no changes are allowed.
Allow Self Assignment Employees can volunteer for unassigned shifts that remain open. Great for filling gaps quickly without needing manager approval.
Allow Registration for Vacant Shifts – Requires Manager Approval Employees can volunteer for open shifts, but each request will wait for manager approval before becoming active. Use this when you want more control over who joins each shift.
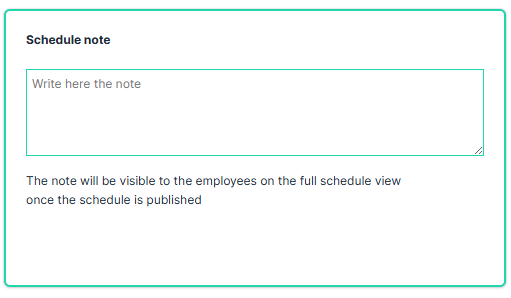
Step 4 – Add a Note (Optional)
Before publishing, you can add a short note that will bevisible to employees, for example, “Please confirm your availability for nextweek” or “Weekend shifts may still change.”
Step 5 – Review and Send Notification
After clicking Publish, a popup window will appear with an automatic message that will be sent to all employees. This message notifies them that the new schedule is available for viewing.
You can edit the text before sending it.
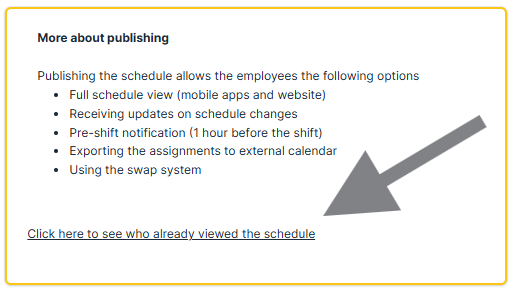
The message will be sent as a push notification to employees through the EZShift mobile app.
If you do not wish to send a message, click the X button.
Step 6 – Track Who Viewed the Schedule
Once the schedule is published, you can track who has seen it by clicking: "Click here to see who already viewed the schedule". This report shows:
First view date
Last view date
Total number of views per employee
That’s it!
Your schedule is now live, and employees can view or sign up for shifts based on the mode you selected.