Creating a Work Schedule in EZShift
This guide will teach you how to prepare a complete work schedule in the system after you've completed the initial setup (positions, shifts, and employee list upload)
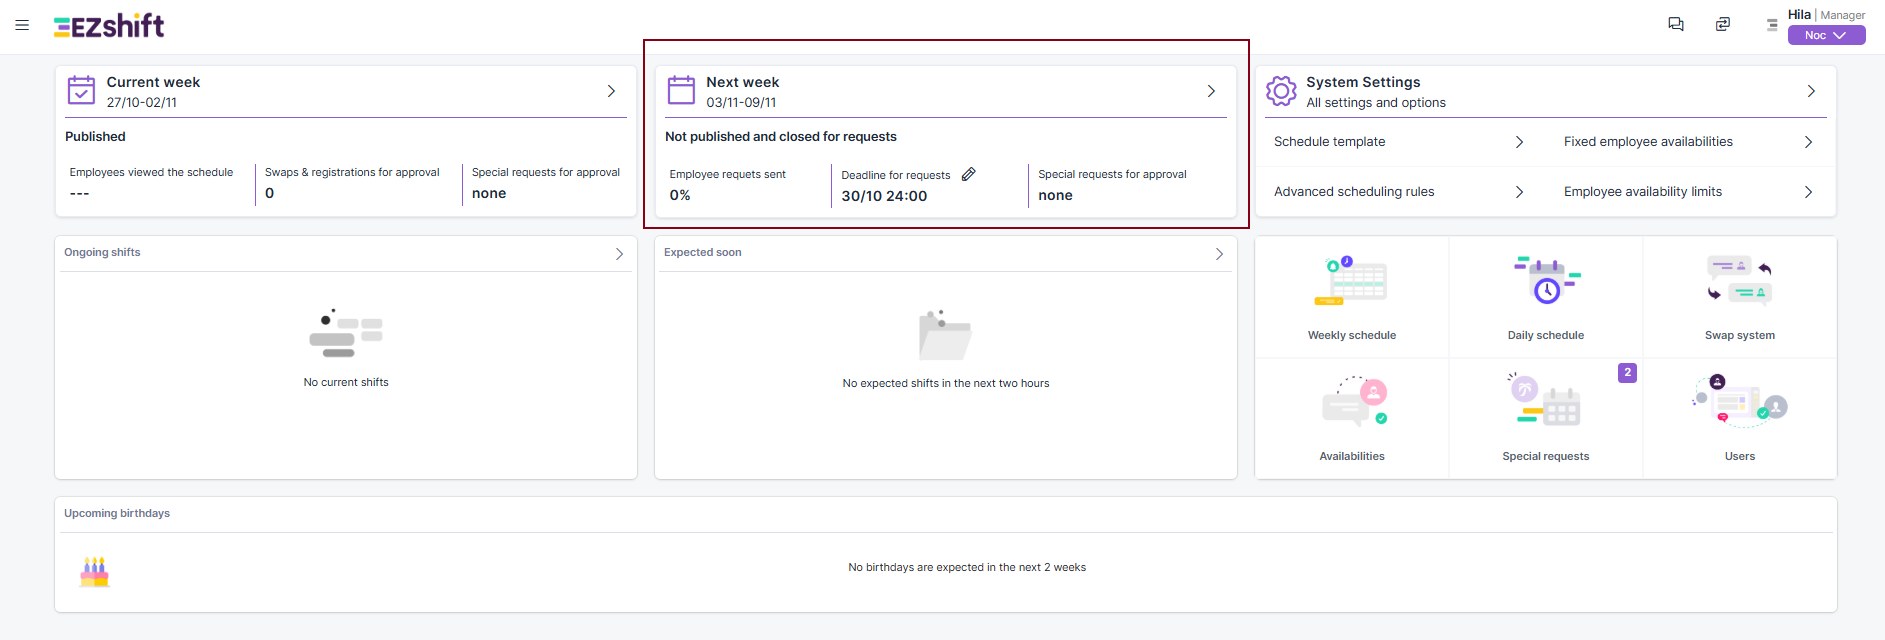
Step 1 - Access the Work Board
Goal: Access the work board for the upcoming week or month where the schedule will be created.
On the main screen, click on "Next week".
Step 2 – Select Default Template
Goal: Choose the weekly structure that will serve as the basis for automatic scheduling.
Select the option "Use the default weekly structure" to use the predefined default weekly template. Alternatively, you can copy the previous week's structure or configure a different structure for each day separately.

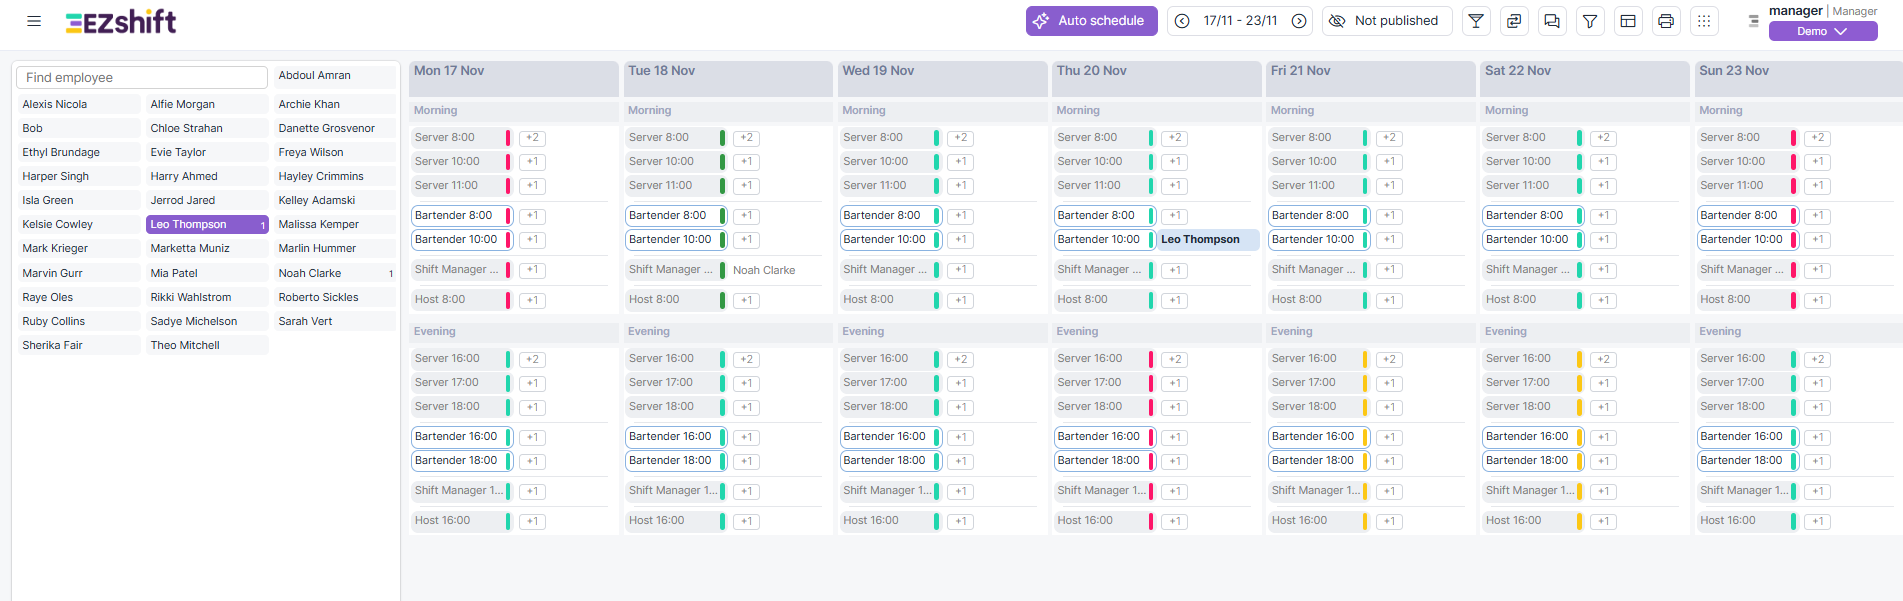
Step 3 (Optional) – Manual Assignment
Goal: Manually assign employees before running auto-scheduling.
You can drag employee names directly to the desired shifts.
Manually assigned shifts will serve as "anchors" — the automation engine will not change them when running the scheduling process.
Step 4 – Run Auto-Scheduling
Goal: Execute EZShift's automatic scheduling engine.
Click the Auto Schedule button at the top of the screen. The system will automatically fill all vacant shifts according to the scheduling rules and preferences configured in advance.
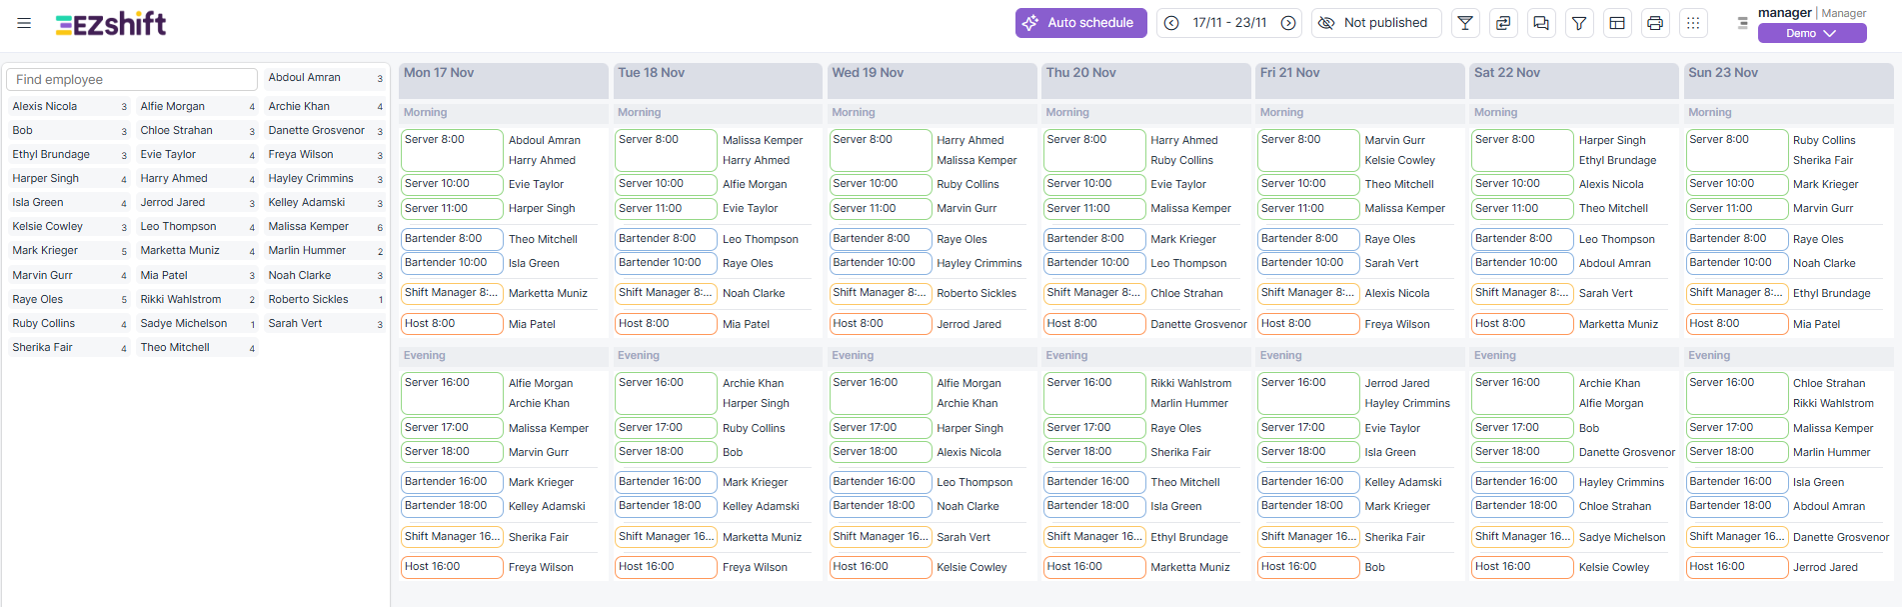
Step 5 – Review the Results
Goal: Verify that the completed schedule is correct, balanced, and meets the organization's needs.
Check for situations of overload, understaffing, or shift conflicts. If necessary, manual corrections can be made directly in the work board.

Step 6 – Publish the Schedule to Employees
Goal: Share the schedule with employees via the app or web interface.
Click the publishing button to publish the schedule. You can attach a message to employees and choose the access type – view only, self-scheduling option, or additional advanced permissions.

Summary
With these steps, you can prepare and publish a complete work schedule in just a few minutes. EZShift ensures that the scheduling is efficient, balanced, and easily viewable for all employees. Additionally, you can configure your organization's unique scheduling rules through the rules interface.