Creating Schedule Templates in EZShift
What Are Templates?
Templates define your standard staffing structure, how many employees you need for each shift, role, and day of the week.
For example, in a restaurant you might want to specify how many waiters are needed on Monday morning, at what time each one should arrive, and how many bartenders or hosts are required.
Templates are your baseline schedule, they make future planning fast, consistent, and accurate.
Step 1 - Access the Template Screen
Click the “Schedule Template” button located on the right side of the main screen.
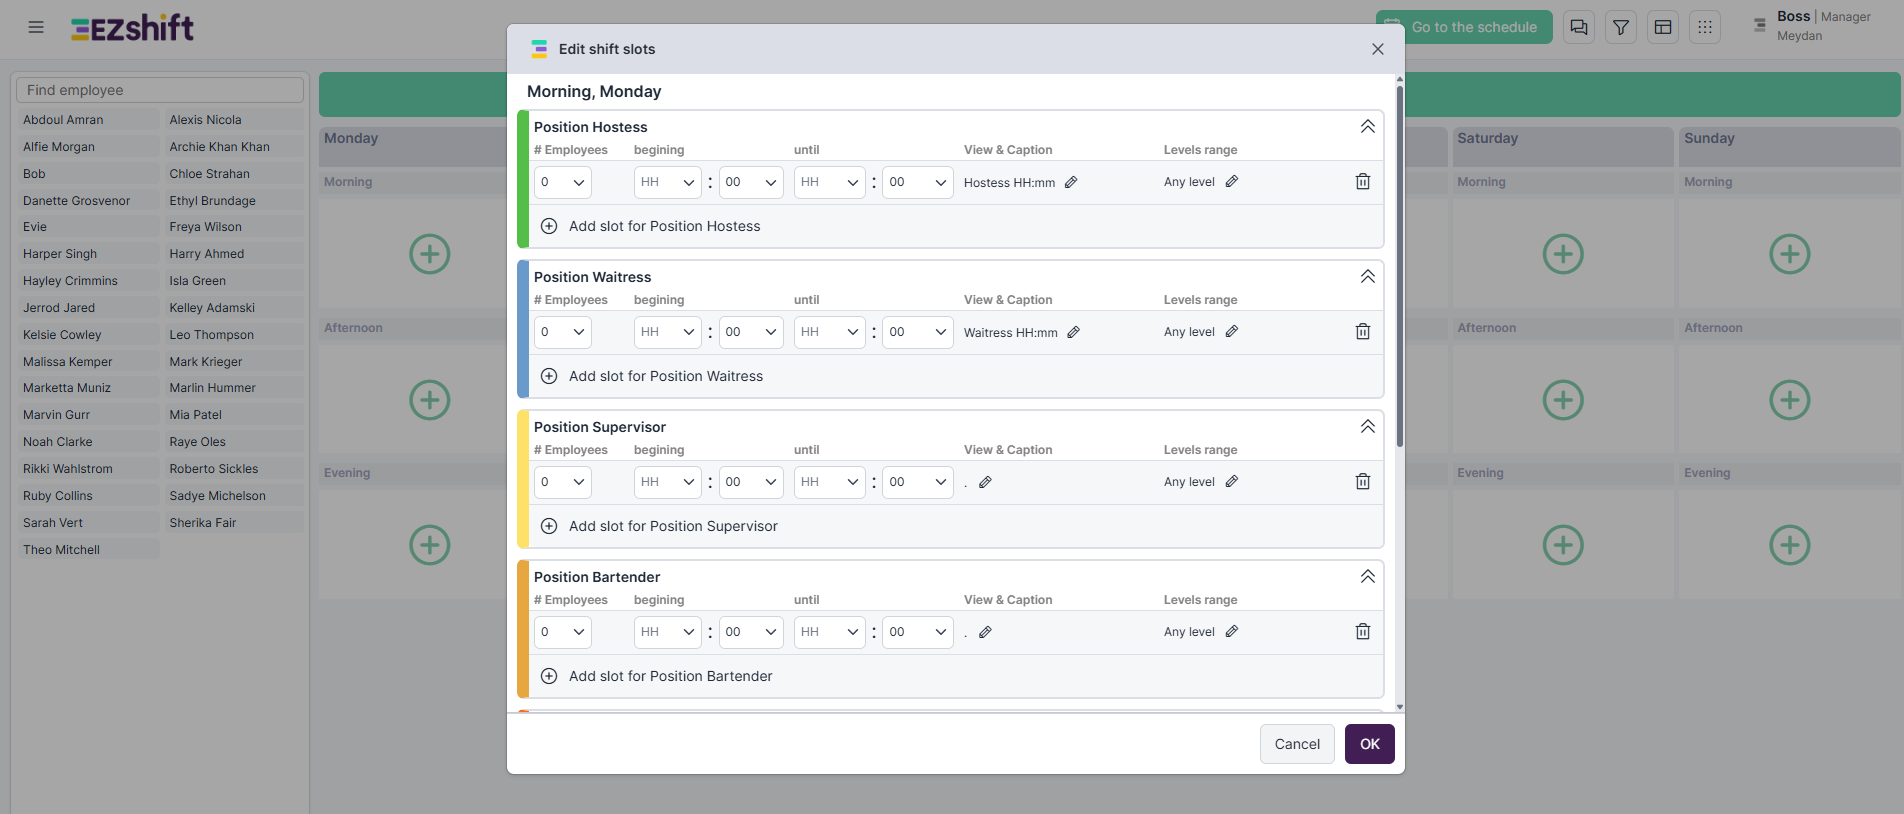
This will open the Template Management view.

If no templates have been defined yet, you’ll see a 7-day layout - each day divided into the shifts you’ve already created in your system.
To start, select the first shift you’d like to define (for example: Monday – Morning) and click the “+” button.

Step 2 – Define Each Shift
In the window that opens, you’ll see a list of all the roles previously defined in your account.
For each role, you can set:
- The number of employees required
- The shift start time
- The shift end time
- The shift title (as it will appear for employees - “View & caption”)
- If your roles have different levels (e.g., Junior Waiter / Senior Waiter), you can also select the required level for that shift)
Step 3 - Add More Rows or Define Shift Strength
You can always add another row for the same role, for example:
- When not all employees start or finish at the same time
- When you want to define shift strength or skill balance
Example: If you need two waiters for the morning shift, but at least one must be senior, you can define it in two rows:
- Row 1 → Level: Senior Waiter only
- Row 2 → Level: Junior–Senior Waiter range
This flexibility ensures every shift is properly staffed according to your needs.

Step 4 – Copy Shifts and Days
Once a shift is defined and saved, you can easily copy it to other days:
- To copy a specific shift, click the menu icon next to the shift title and select Copy shift.
- To copy an entire day, click the menu icon next to the day’s title and select Copy day.
This saves time when defining similar staffing patterns across multiple days.

Step 5 – Save and Return to the Schedule
After finishing your weekly template setup, click “Go to the Schedule” to return to your main rota.
From now on, every new week will automatically start with your default weekly template.
You can always make one-time changes directly on the rota board, or adjust the default rules permanently from the Template screen.

Summary
By setting up your templates, you create a solid foundation for fast, accurate, and consistent scheduling.
Your EZShift rota will now start every week from your predefined staffing standards, saving you time and ensuring full coverage.

