
In EZShift, employees have their own app and user interface - because we believe your staff should have control over their own time. Through the EZShift Employee App, staff members can:
- View their published schedule
- Request shift swaps (subject to manager approval)
- Submit their availability for upcoming schedules
- Send absence requests (vacation, study day, conference, sick leave, etc.)
For an employee to participate in the work schedule and log into the app, you’ll need to set up the employee in the system. Here’s how:
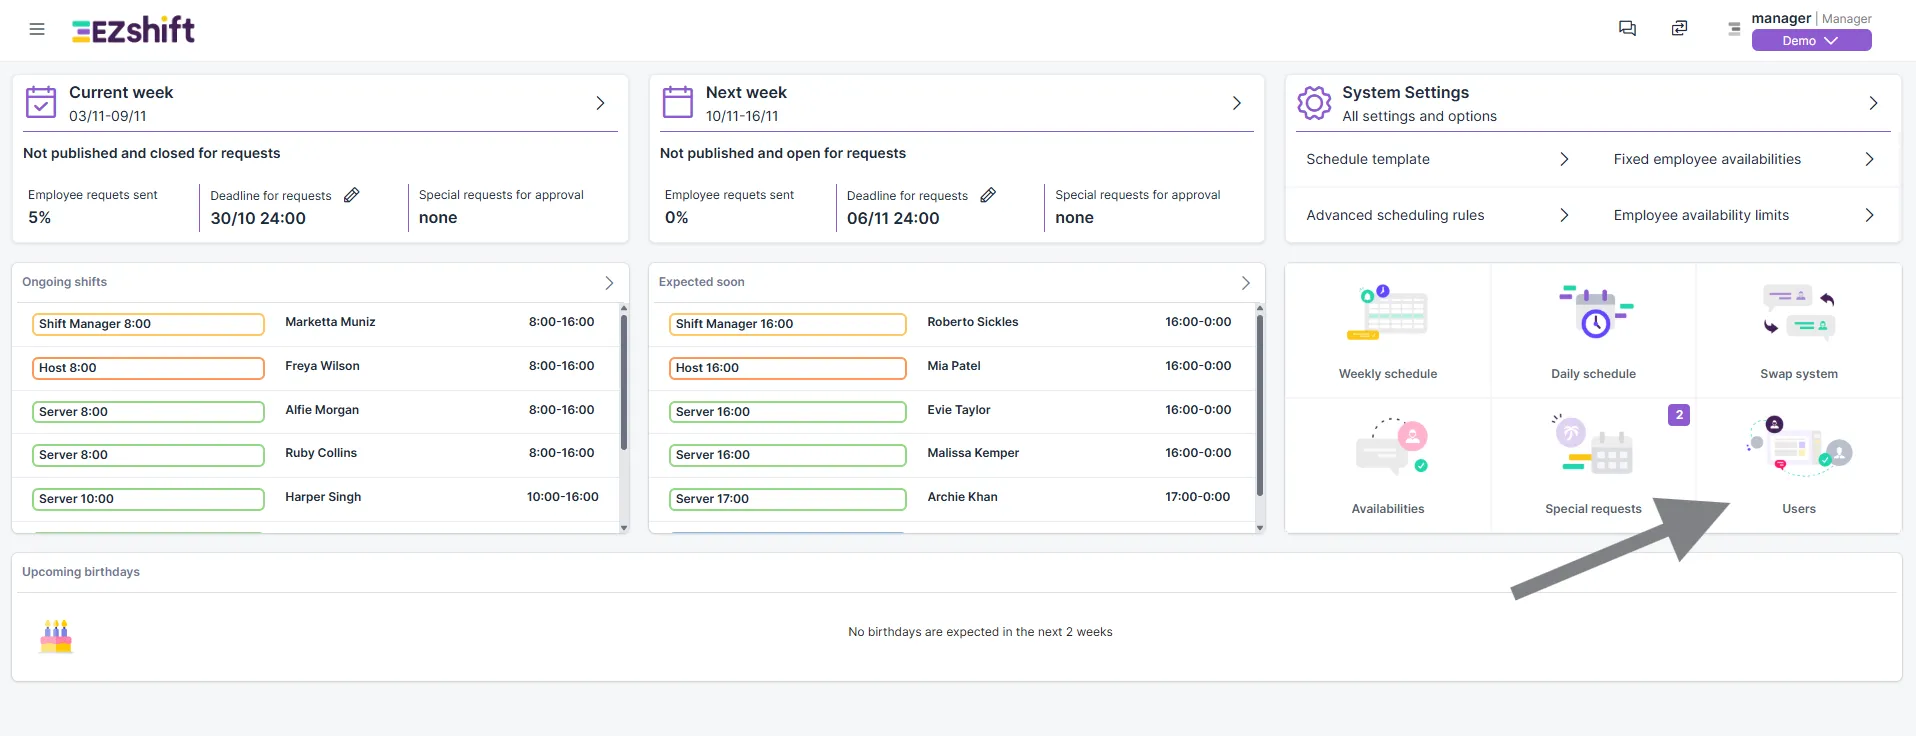
Step 1 – Go to the “Users” Section
From the main menu (on the right side of the screen), click Users.
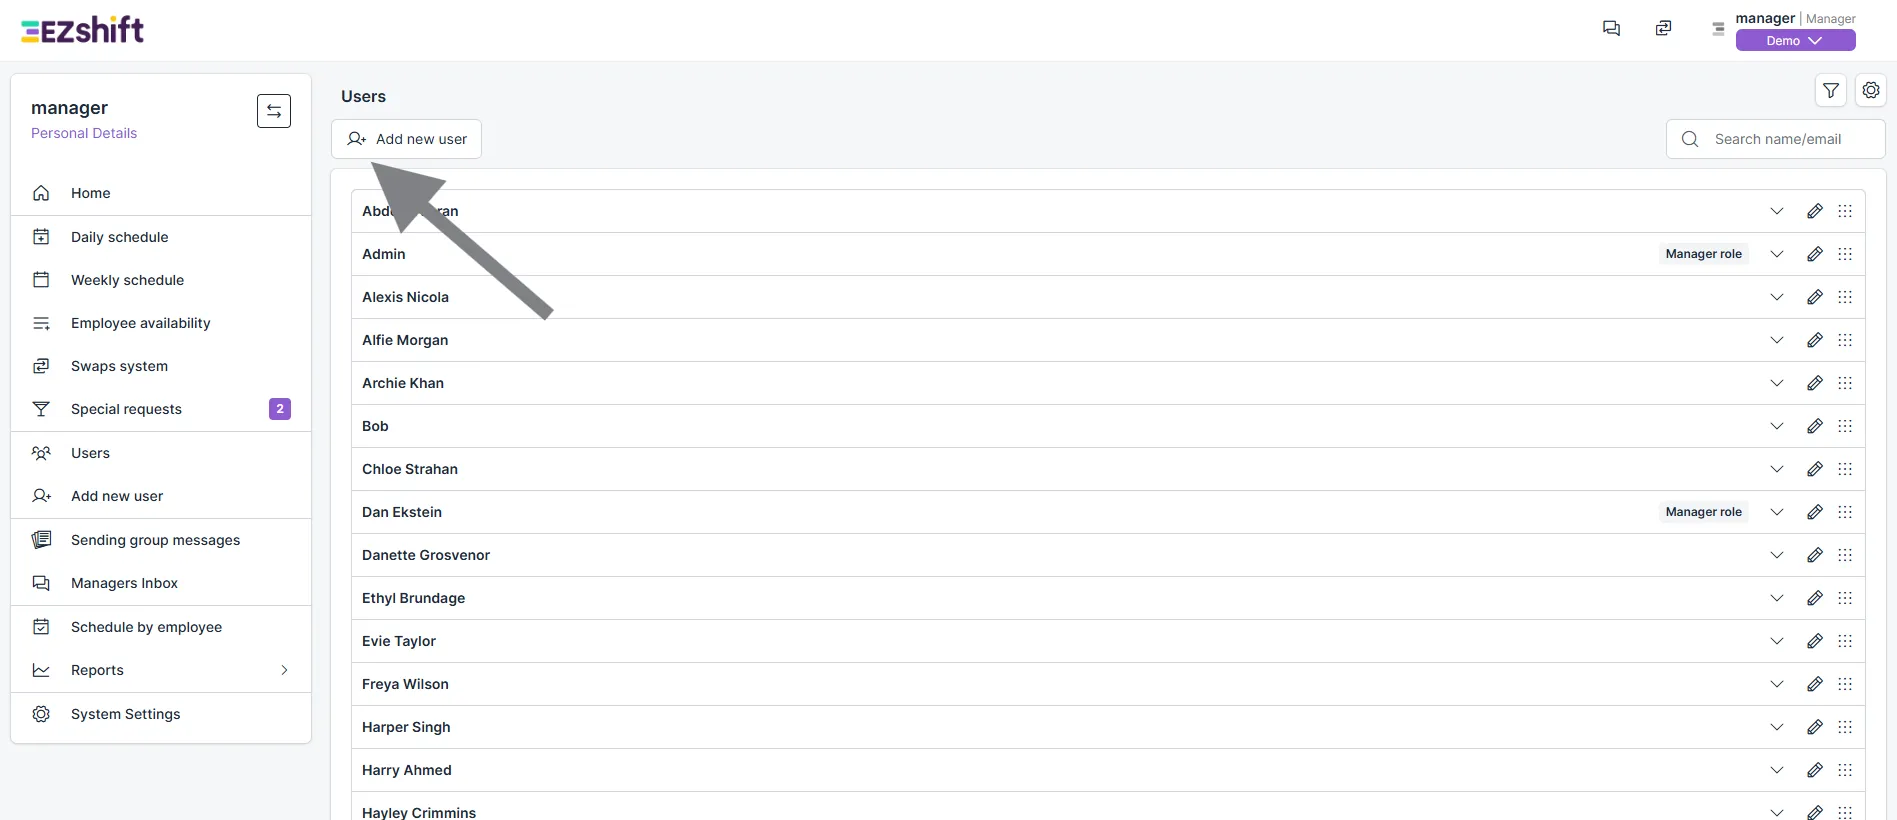
Step 2 – Add a New User
At the top left corner of the Users screen, click Add New User.
Step 3 – Fill in the Employee Details
A new window will open with a form to fill in the employee’s details.
The form is divided into four sections:
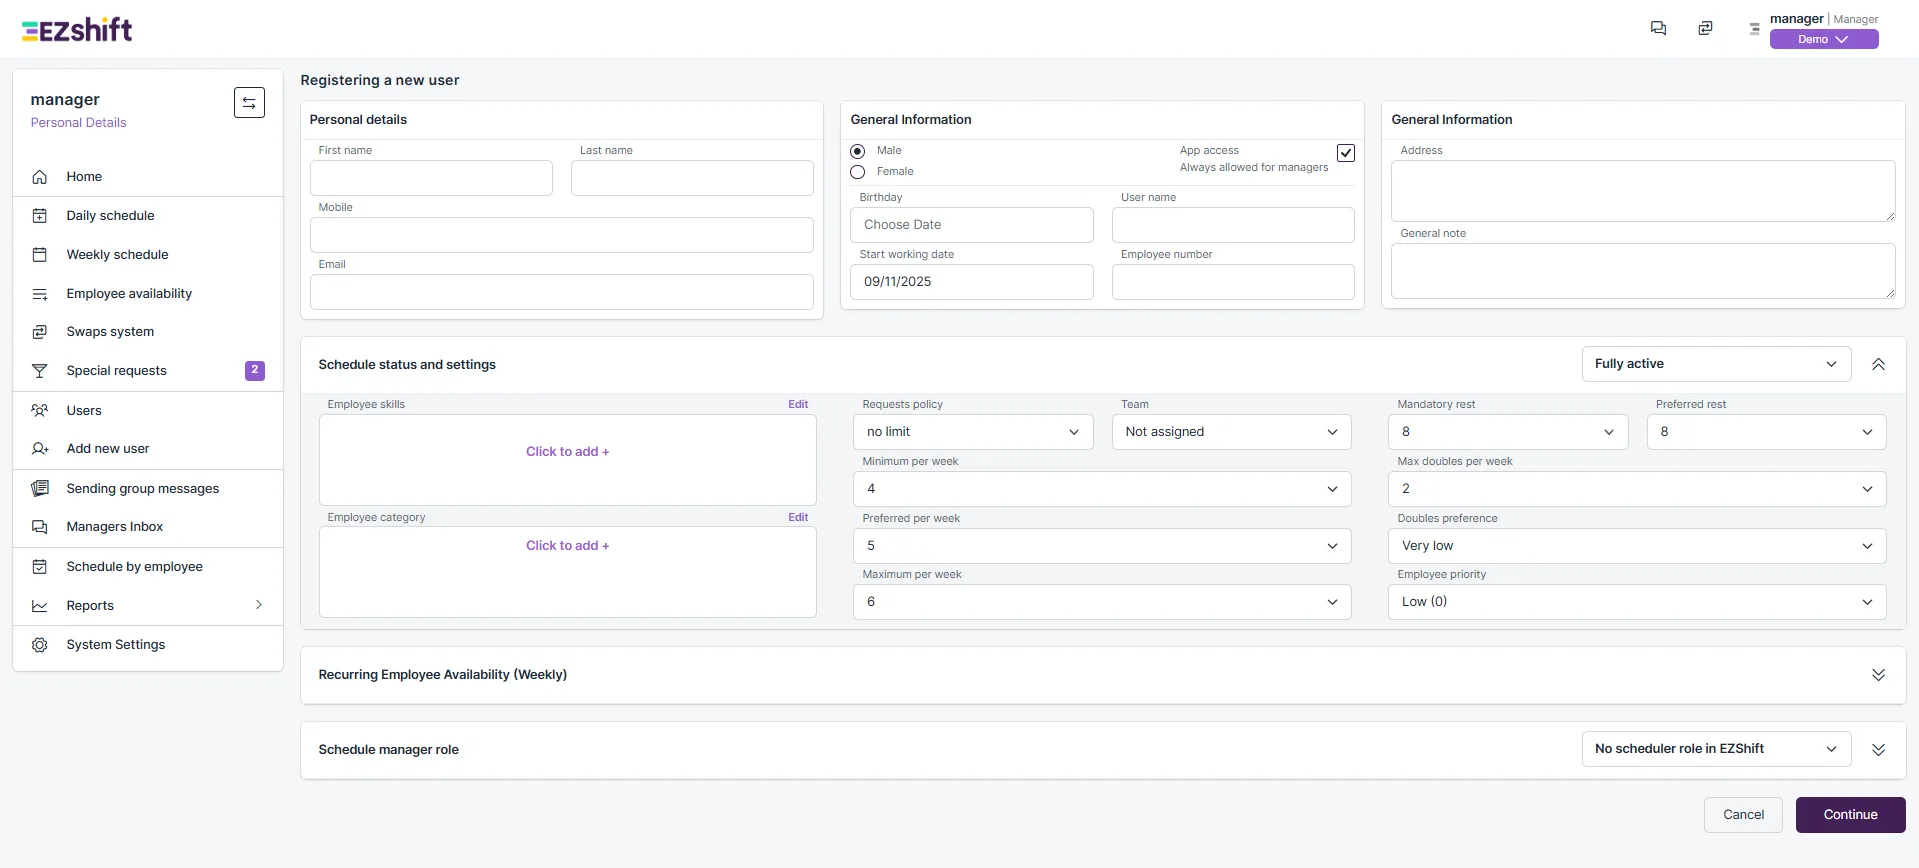
Section 1: General Information
This section includes the employee’s basic details.
Required fields:
- First Name
- Email Address (the employee will use this email to log in to the app)
Section 2: Scheduling Status and Settings
Here you can define how this employee will be scheduled.
- Employee Skills: Assign the employee to the roles they are qualified for.
You can define multiple roles and set priority between main and secondary positions. - Employment Framework: Set the minimum, preferred, and maximum number of shifts the employee can work per week.
- Rest Time: Define the minimum rest period between shifts (e.g., 8 hours).

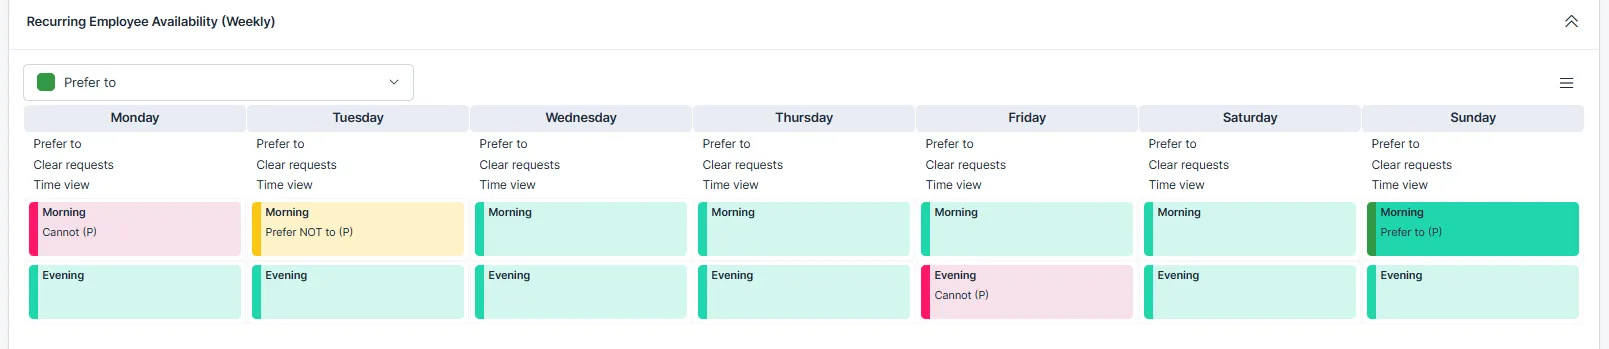
Section 3: Recurring Employee Availability (Optional)
To define fixed days when an employee cannot work, create a “recurring request.”
For example: always unavailable on Monday mornings and Friday evenings.
Section 4: Permission Levels
In this section, you can define management roles and assign the proper permission level to each user.
For example, you can set someone as a Schedule Manager or give them view-only access.

Step 4 – Save Your Changes
Once all fields are filled in - don’t forget to click Save.
Your new employee will now receive an automatic registration email with login instructions and app download links. Inside the app, employees will also find short tutorial videos on how to use EZShift.
Additional Tip
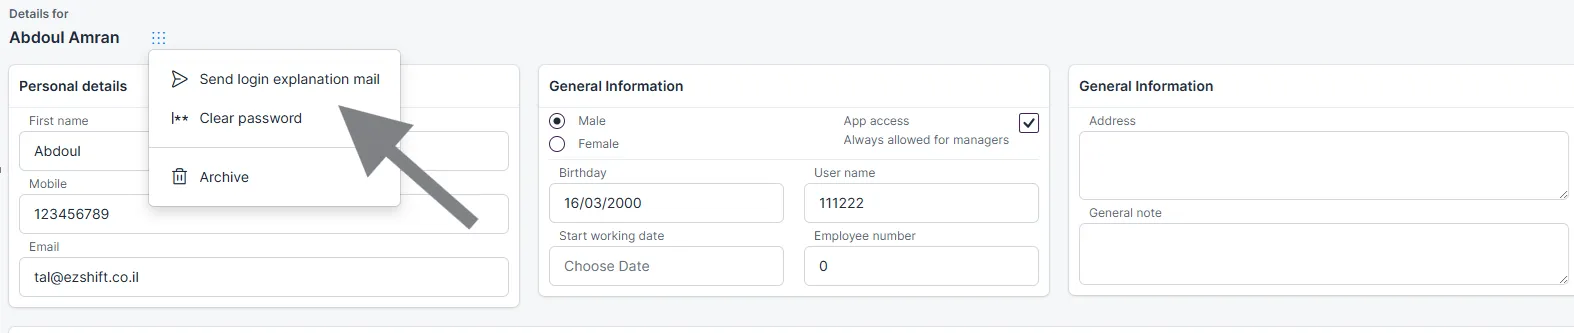
If you want to re-send the registration email to an employee who already exists in the system, go to their profile in the Users screen and click the menu icon next to their name - then select Resend Registration Email.
That’s it!
Your new employee is now set up in EZShift and ready to use the app.